Motorcycle Chain Adjustment DIY
Adjusting the chain on your motorcycle is one of the few maintenance tasks that you should do regularly. On top of a tuneup or an oil change, adjusting the chain is one of the most frequent things you will do. It’s easy to see when it needs to get done and you clean and lube the chain while you’re at it. Doing a motorcycle chain adjustment takes less than 20 minutes and you don’t need any special tools or a bike stand to do it.
When A Chain Needs Adjusting
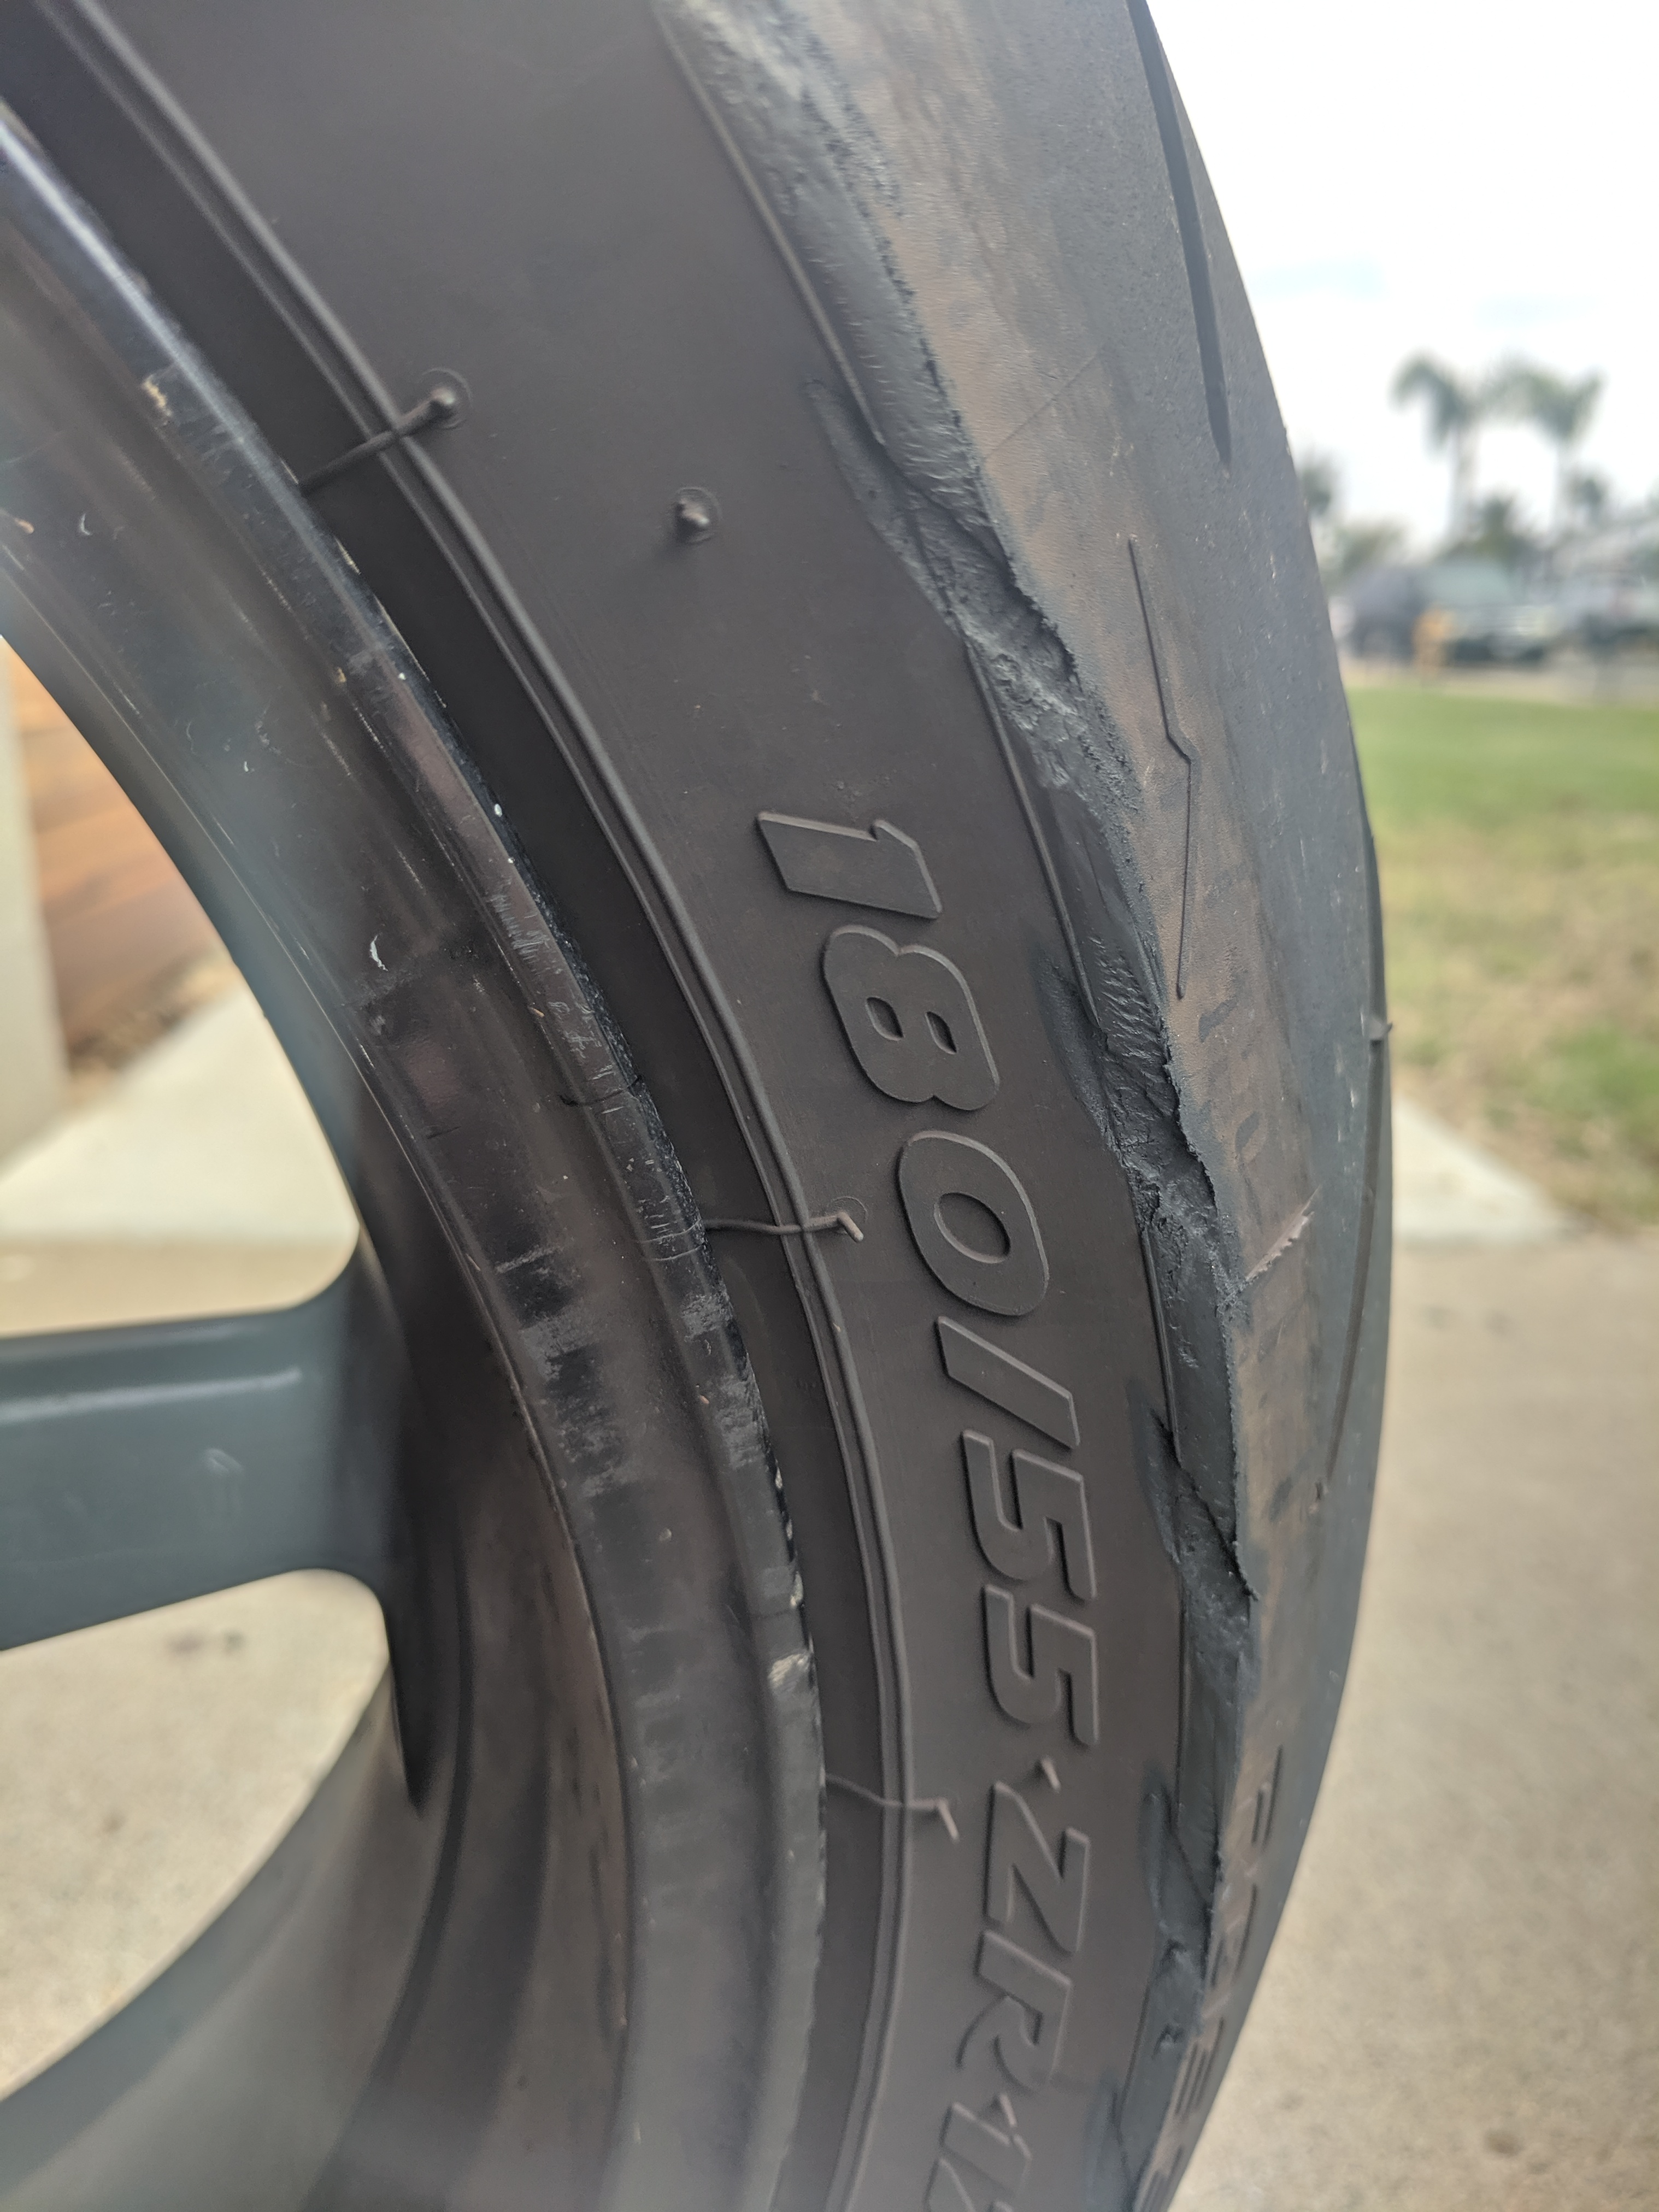
Chain rub marks on tire

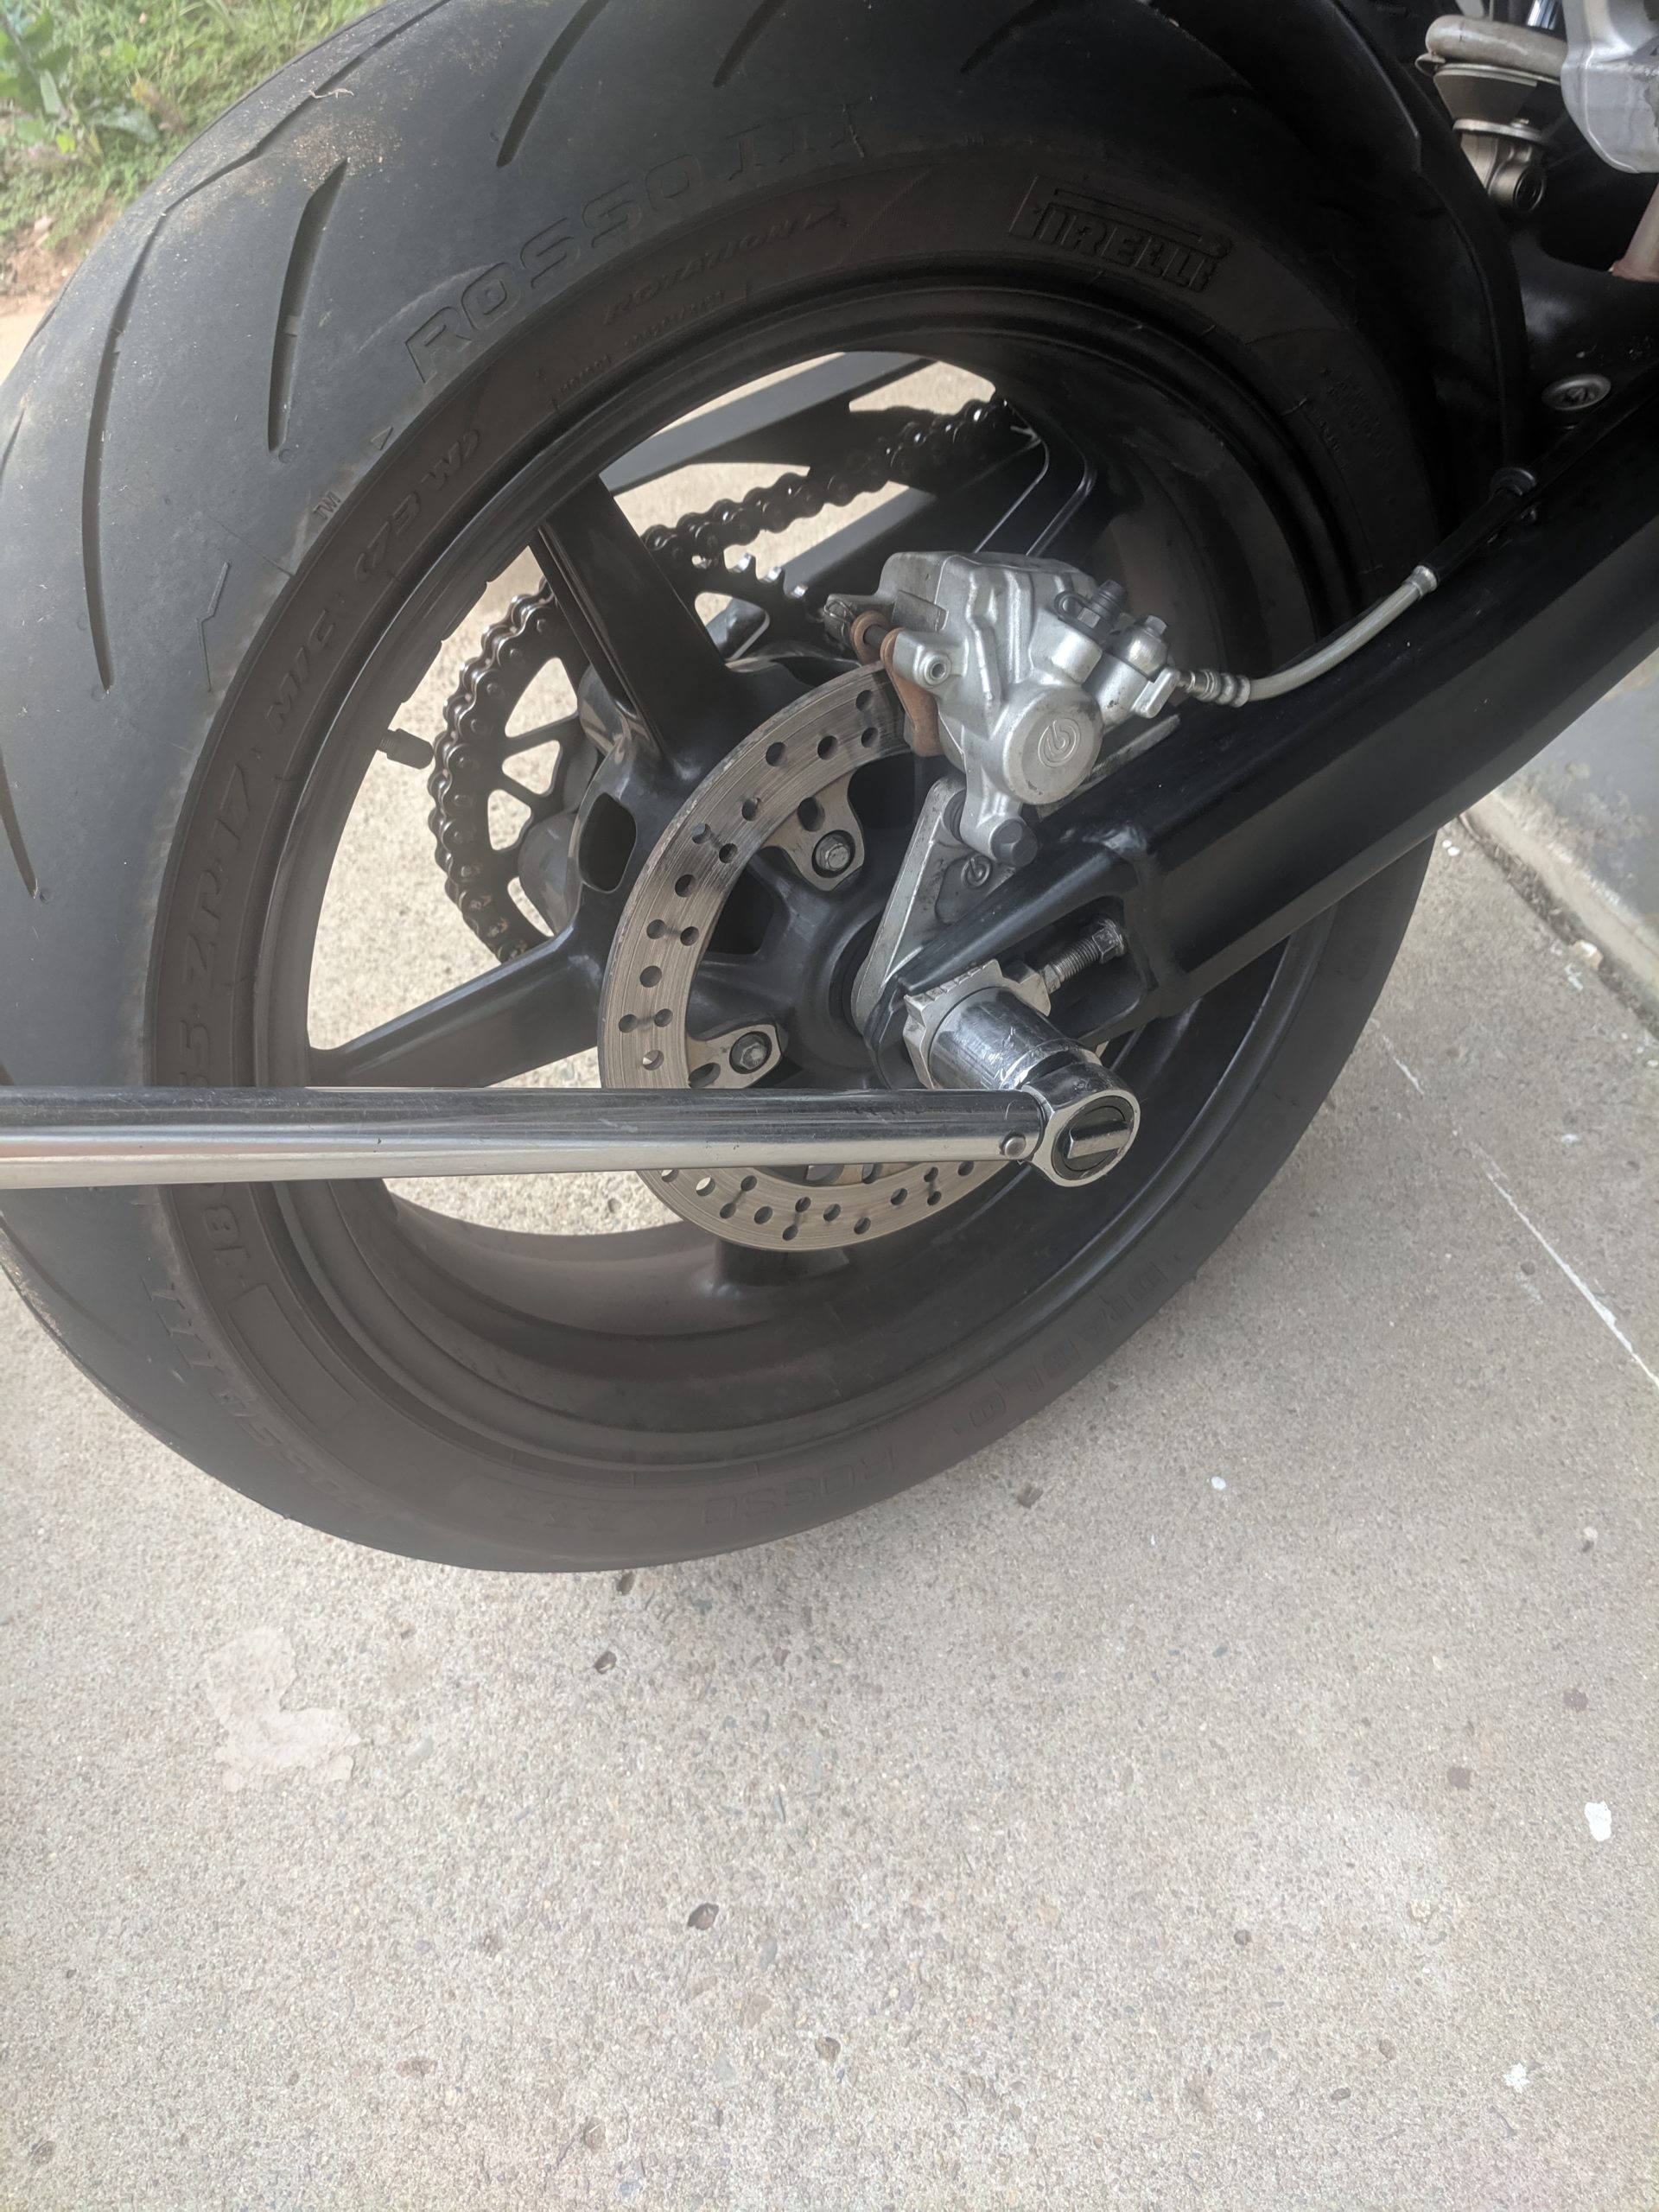
Chain mark on swingarm
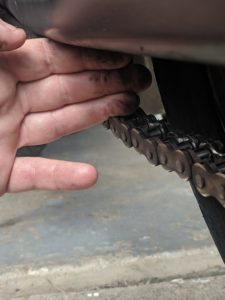
Normally you should check your chain slack every 500miles. The motorcycle manual will have the specs for each bike but a good rule is the “3 finger” adjustment. Simply if you can stick 3 fingers between your chain and swingarm and the chain has some slack, it needs to be adjusted.
My bike is a 2008 KTM SuperDuke 990 that I use as a daily commuter. This past time I let the chain get a little to lose and it started to rub against the side of my wheel and part of my swingarm.
Motorcycle Chain Adjustment Tools

One of the problems with adjusting your chain is getting wheel perfectly straight. I found out that by using a pair of digital calipers that I could center the rear axle on the swing arm. To adjust your chain you will only need a few tools. The only specialty tool is a set of calipers. You can get a cheap set at Harbour Freight or order a nice digital caliper online. What I needed for my bike was a 1 1/4 inch socket, a large breaker bar, a torque wrench that can go up to 150 ft/lbs, and a set of gear wrenches.
Step 1
 The first step is to loosen the axle. Use the 1 1/4 inch socket and the large breaker bar. Be sure to keep a hand on your bike since the rear nut is usually put on pretty tight.
Step 2
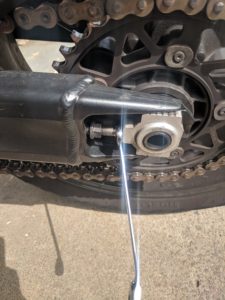
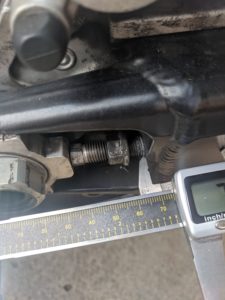
The second step is to loosen the nuts on the chain adjuster bolts. On my bike, I used my gear wrenches for this. One was 13mm and the other was 10mm. While holding the bolt with the 10mm wrench, loosen up the nut with the 10mm wrench. Repeat this for the other side.

Step 3
With the real axle lose and the chain adjuster bolts loosened, adjust the chain slack with the chain adjuster bolts. A quick idea of how much chain slack you need it to go by the 3 finger method. Adjust the chain until you can only fit 3 fingers between the chain and the swingarm at the midpoint of the swingarm.
Step 4
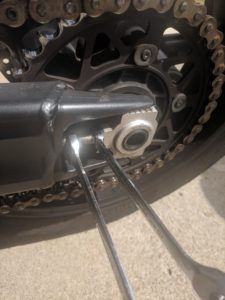
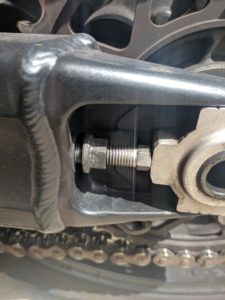
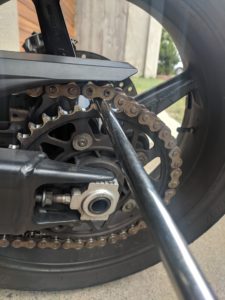
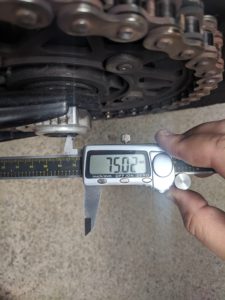
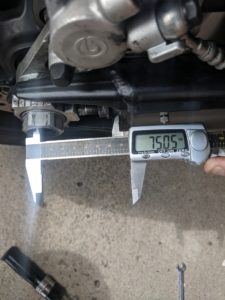
To center the wheel in the swingarm, use the digital caliper to fine-tune your adjustments. To make sure you are getting an accurate reading, use it as socket extension to wedge between the chain and sprocket. Roll the bike backward so that sprocket takes the slack out of the chain. Using the digital caliper measure from where the adjuster nut contacts the swingarm to the centerline of the axle on both sides. Use the adjuster bolt to get the axle the street is possible.
-

- Chain Slack
-
- Measurement Point
-
- Left Side
-
- Right Side
Step 5
With the swingarm centered, just reverse the steps above. Start with the adjuster bolts and nuts. Hold the bolt straight with the 10 mm wrench and cinch up the nut 13 mm ratchet. The last step is to tighten down the axle to the correct torque from your owners manual using the torque wrench. Roll the bike forward and remove the extension bar. After a quick test ride, double check that nothing has loosened up.
Leave a Reply