KTM Selle Dalla Valle Seat Cover Replacement
 The seat cover on my 2014 KTM 450 SXF was showing signs of wear after 150 hours of use. I wanted to keep the stock look but upgrade to a Selle Dalla Valle seat cover. I’ve done a seat cover replacement on my old bike, a 2009 KX450F. It was kind of a pain to do as a result of not having a good stapler. I only had a hand-powered stapler, and it was not powerful enough to drive the staples. I had to hand hammer just about every staple I put in.
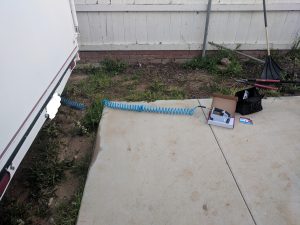
When I installed the seat cover this time, I stepped up to an electric stapler, and it still wasn’t powerful enough. Using a pneumatic stapler was my only option to make the seat cover installation go smoothly. I had to get creative since I didn’t have an air compressor to power the stapler. My toy hauler has an external air tank for inflating tires and has a capacity just enough to power the pneumatic stapler.
KTM Stock Seat Cover
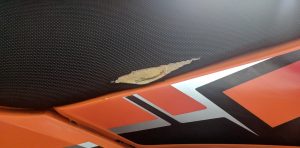
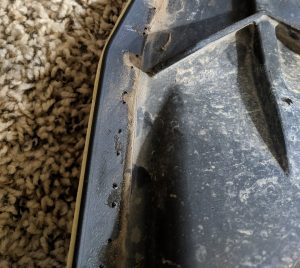
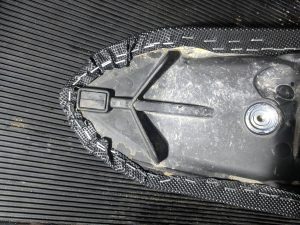
The stock seat cover on my KTM held up pretty well for the number of hours I have on my bike. It started to have tears in a couple of areas, and it was making my bike look clapped out. One of the problems with tears in the seat cover is that the foam can start to absorb water from riding or just washing your bike. The water will start to cause the foam to break down and become soft. The tears on my stock seat cover were not to bad, but after 5 years and 150 hours, it was time to replace.
Seat Cover Removal
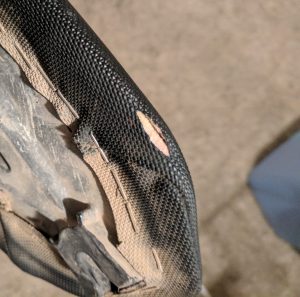
Removing the stock seat cover is pretty simple but a little time-consuming. All you need is a flat-blade screwdriver and a pair of pliers. Seat covers are stapled all around the perimeter, so it can take some time to work all the staples out.
Installation Tools

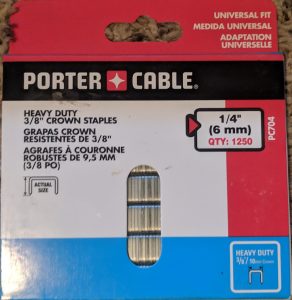 I’ve tried hand power staplers and electric power staplers, but to really make this job easy, you need to use a pneumatic stapler. You don’t need to go overboard with air tool so I just bought the cheapest that would get the job done. Porter Cable has a pneumatic stapler for a reasonable price. I used the same-sized staples that I pulled out. They are 1/4 inch deep staples, and even though that doesn’t sound big, they bite into the plastic and hold well.
Installation
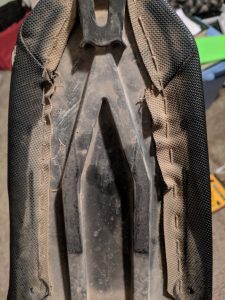
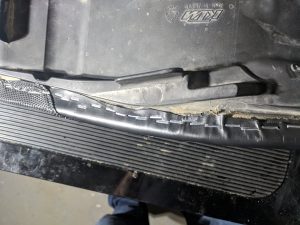
I had to get creative and use my toy hauler air compressor to use the air stapler. To get the seat cover to sit flat and tight, you need to work the cover from front to back. It can take several times to get it without ripples in the cover. You will also need to trim the cover in some areas. The seat cover is made intentionally oversized, so trim the edges so there is not a lot of excess material. You should be generous with how many staples you use. I pumped in staples all around the edge of the seat to get it to sit flat and not move.
-

- Toy Hauler Air Compressor
-
- Trimed edges
-
- Staples on the perimeter
Final Result
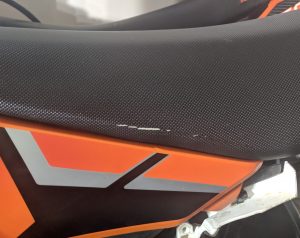
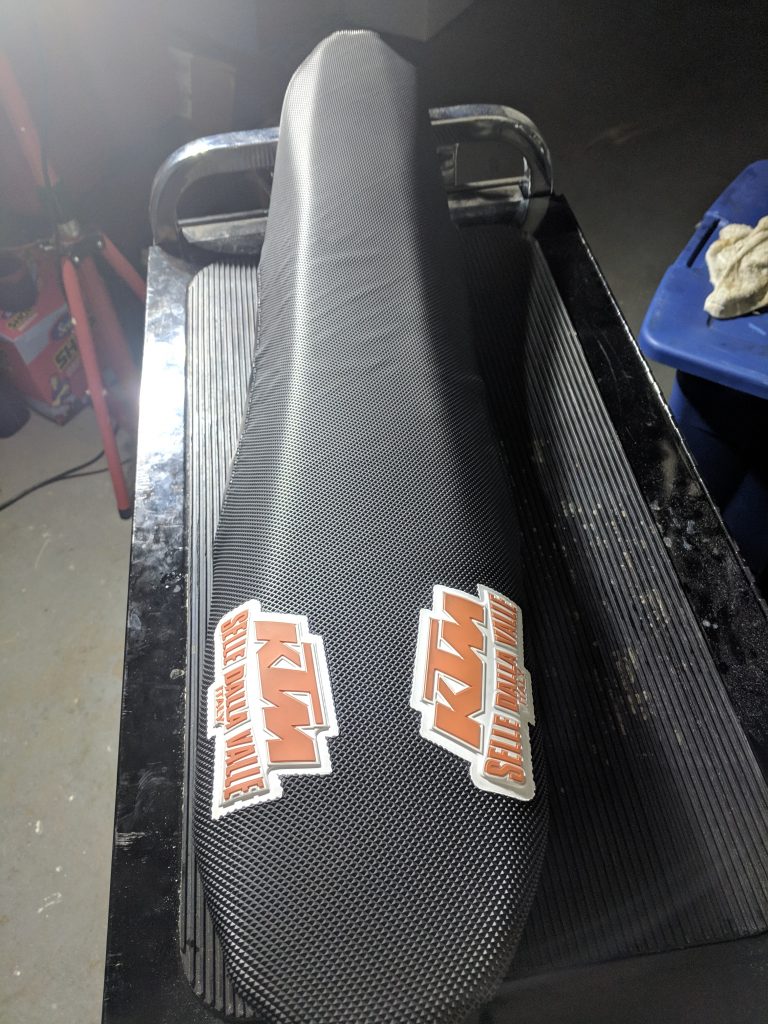
After 45 minutes or so of working on the seat cover, I was done. One thing that threw me off was the Selle Dalla Valle logo on the back of the seat. The logo is printed at a slight angle. As a result, it can look like the seat cover was not mounted straight. The front and back of the logo don’t match up on the opposite side. This can also throw you off when installing it. Overall, I was able to get the seat cover mounted with only some slight ripples that should tighten up over time. The texture of the seat cover is much more aggressive than the stock cover. It might be from the stock cover having so much time on it, but it definitely felt like there is more grip on the new cover.
-

- Uneven Logos
-

- Slight ripples
Leave a Reply